Introduction
Video editing has become more accessible with the advent of mobile editing apps, and one of the most popular and powerful apps available today is KineMaster. Whether you’re a beginner or an experienced editor, KineMaster’s user-friendly interface and robust features make it an ideal tool for creating professional-quality videos right from your phone or tablet. In this comprehensive guide, we will walk you through how to use the KineMaster app effectively, covering all the essential features and techniques you need to know.
Getting Started with KineMaster
Before diving into editing your videos, it’s important to first get familiar with how to use the KineMaster app. Begin by downloading and installing the app from the Google Play Store (for Android) or the Apple App Store (for iOS). Once installed, open the app to begin the editing process.
When you first launch the KineMaster app, you’ll be prompted to either sign up or log in. However, you can use the app without logging in, but creating an account will give you access to more features and cloud storage options.
The home screen offers various options, including creating a new project, accessing your saved videos, or exploring the KineMaster assets store for additional effects, transitions, and music. To start a new project, tap on the “+” button, and you can immediately begin editing your video.
Navigating the KineMaster Interface
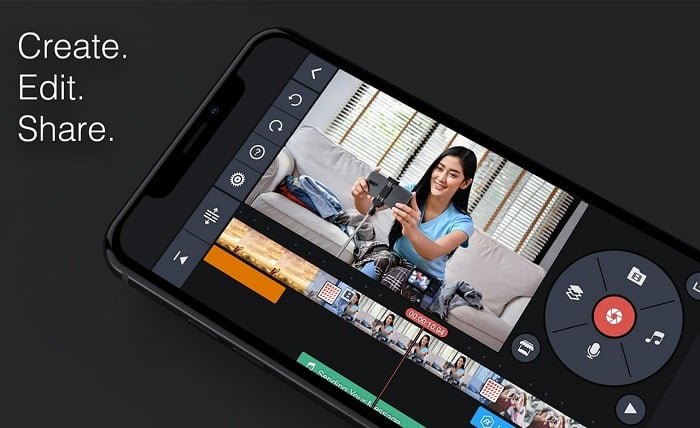
Once you’ve started a new project, it’s important to understand the layout of the KineMaster interface. The screen is divided into several sections:
- Timeline: The timeline is where you can see and arrange your video clips, audio, images, and other assets. You can zoom in and out of the timeline for better precision.
- Preview Window: The preview window displays a real-time view of your video as you edit.
- Layer Section: Here, you can add different layers for video, images, text, and effects.
- Media Browser: This is where you can browse through your media files like photos, videos, and music that you want to add to your project.
Each section of the interface is intuitive and easy to use, ensuring a smooth editing process. Understanding the layout is the first step in learning how to use the KineMaster app efficiently.
Importing and Editing Video Clips
The first key task in editing with KineMaster is importing and editing your video clips. To do this, tap the “Media” button from the left-hand menu. You can then browse your device’s gallery or file storage to find the video clip you want to add.
Once your clip is imported into the timeline, you can easily trim, split, or rearrange your clips. To trim a clip, select it in the timeline and drag the edge of the clip inward to shorten it. For splitting, position the playhead where you want to split the clip, and then use the “Split” option to divide it into two segments.
Additionally, you can adjust the speed of your clips by selecting the clip, clicking on the “Speed” option, and choosing a faster or slower pace. This feature is perfect for creating slow-motion or time-lapse effects, and it’s one of the most powerful editing tools in KineMaster.
Adding Transitions and Effects
One of the most fun and creative parts of video editing is adding transitions and effects. KineMaster offers a wide range of transitions, from simple fades to more complex animations. To add a transition, simply tap on the space between two clips in the timeline, and a menu will appear allowing you to choose from various transition effects.
In addition to transitions, KineMaster offers a vast library of visual effects. You can apply filters, overlays, and animations to enhance your footage. To add an effect, tap on the “Layer” button and select the type of effect you want to add. You can adjust the duration, opacity, and other parameters to customize the effect according to your vision.
KineMaster also allows you to add text and graphics. To do this, tap on the “Layer” button, then select “Text” to type in your desired message. You can then customize the text’s font, color, and animation, which is particularly useful for adding titles or captions to your videos.
Incorporating Audio and Music
Audio plays a significant role in video editing, and KineMaster makes it easy to incorporate music, voiceovers, and sound effects. To add audio to your project, tap on the “Audio” button from the left-hand menu and browse through your files or the KineMaster music library. You can import songs, sound effects, or even record your own voice directly into the app.
Once your audio is added, you can adjust the volume, fade in and out, and even sync it with specific moments in your video. KineMaster also provides tools for removing background noise, ensuring that your voiceover or music sounds crystal clear.
For more advanced audio editing, KineMaster allows you to use multiple audio tracks. This feature is useful if you want to layer background music, voiceovers, and sound effects simultaneously.
Exporting Your Final Video
After you’ve finished editing your video, the final step is exporting it. KineMaster makes this process easy and flexible, allowing you to choose the resolution, frame rate, and format of your exported video. To export, simply tap on the export icon located at the top right corner of the screen.
KineMaster gives you several options for video resolution, from 720p to 4K, depending on the quality you desire and the capabilities of your device. You can also choose to export your video at different frame rates, such as 24fps or 30fps, depending on your desired look.
Once your video is exported, it will be saved to your device’s gallery, and you can share it directly to social media platforms like YouTube, Instagram, or Facebook.
Tips for Mastering KineMaster
To make the most of your KineMaster experience, here are some additional tips and tricks:
- Use Keyframe Animation: Keyframe animation allows you to animate different layers and effects over time. This is a great way to add smooth transitions or dynamic motion to text, images, and videos.
- Try the Chroma Key Tool: The Chroma Key feature lets you remove a solid background color (usually green or blue) and replace it with another video or image. This tool is perfect for creating green screen effects.
- Use the Asset Store: KineMaster offers an asset store where you can find additional tools, effects, fonts, and transitions. Some assets are free, while others are available for purchase.
- Experiment with Multi-Track Editing: You can layer multiple video and audio tracks in KineMaster. This feature allows you to combine footage from different sources seamlessly.
- Utilize the Undo and Redo Buttons: Editing can be a trial-and-error process, so take advantage of KineMaster’s undo and redo buttons to easily revert any mistakes.
By mastering these tips and regularly using the app, you’ll quickly become proficient at using KineMaster for your video editing projects.
Conclusion
Learning how to use KineMaster app opens up a world of creative possibilities for video editing. Whether you’re creating content for social media, making vlogs, or editing professional projects, KineMaster provides all the tools you need. From importing video clips to adding transitions, effects, and audio, every feature is designed to give you complete control over your video. With practice, you’ll become an expert at navigating the app and producing high-quality videos. We hope this guide has helped you get started on your KineMaster journey, and we encourage you to experiment and explore the app’s full potential.
FAQs
1. How do I add multiple layers in KineMaster? To add multiple layers, tap on the “Layer” button, then select the type of content (video, image, text, or audio) you want to add. You can add as many layers as you need, and arrange them on the timeline.
2. Can I use KineMaster for free? Yes, KineMaster offers a free version, but with some limitations. You can remove the watermark and access additional premium features by upgrading to the subscription version.
3. How do I add music to my KineMaster project? To add music, tap on the “Audio” button, browse your music library or import files, and drag the audio clip to your timeline. You can adjust the volume and sync the audio with your video.
4. How do I create slow-motion videos in KineMaster? To create slow-motion videos, select the video clip, tap on the “Speed” option, and adjust the slider to slow down the footage. You can choose the speed percentage based on your preference.
5. Can I export my video in 4K? Yes, KineMaster supports 4K video exports. However, your device must be capable of handling 4K resolution to ensure smooth export and playback.