Introduction
KineMaster is one of the most popular video editing apps available for mobile devices. Known for its user-friendly interface and advanced features, it’s a go-to choice for creators worldwide. However, using KineMaster on a PC takes your video editing experience to the next level. Whether you’re a content creator, marketer, or hobbyist, downloading the KineMaster app for PC unlocks enhanced efficiency, a larger workspace, and superior performance.
In this guide, we’ll walk you through how to download KineMaster app for PC, its benefits, and frequently asked questions to help you make the most of this fantastic tool.
KineMaster’s PC Compatibility
Before you proceed to download KineMaster app for PC, it’s essential to understand its compatibility. Officially, KineMaster is designed for mobile platforms like Android and iOS. However, with the help of emulators, you can seamlessly run the app on your Windows or Mac computer.
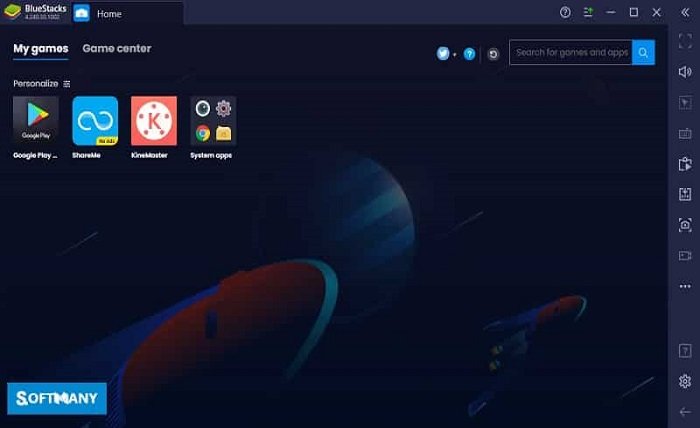
Using the KineMaster app on a PC via an emulator allows you to access its full suite of features on a larger screen. Emulators like BlueStacks and NoxPlayer make this possible by replicating the Android environment on your computer.
Preparing Your PC for KineMaster Download
Before you download the KineMaster app for PC, ensure your computer meets these basic requirements:
- Operating System: Windows 7, 8, 10, or macOS
- RAM: Minimum 4GB (8GB recommended for smoother performance)
- Processor: Intel or AMD dual-core processor
- Storage: At least 5GB of free disk space
Meeting these specifications ensures a smooth experience while using the KineMaster app for PC. Next, you’ll need an Android emulator to get started.
Choosing the Best Emulator for KineMaster
To download the KineMaster app for PC, selecting the right emulator is crucial. Here are the top options:
- BlueStacks: A widely used emulator known for its stability and performance. Perfect for running KineMaster on your PC.
- NoxPlayer: Another great option with a simple interface and reliable Android emulation.
- LDPlayer: Optimized for gaming but equally suitable for running apps like KineMaster.
Downloading the KineMaster app for PC with any of these emulators ensures seamless video editing. We’ll use BlueStacks as an example for the installation process.
Installing BlueStacks and KineMaster
Here’s how to download the KineMaster app for PC using BlueStacks:
- Download BlueStacks: Visit the official BlueStacks website and download the installer compatible with your system.
- Install BlueStacks: Follow the on-screen instructions to install the emulator on your PC.
- Set Up BlueStacks: Sign in with your Google account to access the Google Play Store.
- Search for KineMaster: Open the Play Store in BlueStacks and search for “KineMaster.”
- Download and Install: Click the install button to download the KineMaster app for PC. Once installed, open the app from the BlueStacks home screen.
Exploring KineMaster’s Features on PC
Once you’ve downloaded the KineMaster app for PC, it’s time to explore its powerful features. Here are some highlights:
- Multi-Layer Editing: Add and manage multiple layers of video, images, and text.
- Chroma Key: Remove backgrounds for green-screen effects.
- Audio Tools: Enhance videos with voiceovers, sound effects, and music tracks.
- Advanced Transitions: Smoothly transition between clips with professional-grade effects.
Using the KineMaster app on a PC gives you the advantage of precise controls and faster processing, ensuring high-quality video edits.
Tips for Optimizing KineMaster Performance on PC
To get the best out of the KineMaster app for PC, follow these tips:
- Allocate More RAM: Adjust emulator settings to allocate more memory for smoother performance.
- Update Graphics Drivers: Ensure your PC’s GPU drivers are up to date for optimal rendering.
- Use Keyboard Shortcuts: Learn shortcuts for common tasks to save time.
- Enable High-Performance Mode: In your PC’s power settings, choose a high-performance plan.
These tweaks can make a significant difference when using the KineMaster app on your PC.
Advantages of Using KineMaster on PC
When you download the KineMaster app for PC, you unlock several advantages:
- Larger Screen: Editing on a bigger screen improves precision and visibility.
- Improved Controls: Use a mouse and keyboard for finer adjustments.
- Faster Processing: PCs typically have more powerful hardware than mobile devices.
- Better Storage Options: Store large video files on your PC without worrying about space constraints.
These benefits make the KineMaster app for PC a must-have for serious video editors.
Conclusion
Downloading the KineMaster app for PC is a game-changer for content creators. With its robust features and the power of desktop hardware, you can produce professional-quality videos effortlessly. Follow the steps in this guide to download and install the KineMaster app for PC today. Start creating stunning videos and take your projects to new heights.
FAQs
1. Can I download KineMaster app for PC without an emulator? No, KineMaster is primarily designed for Android and iOS. An emulator is required to run it on a PC.
2. Is KineMaster free to use on a PC? Yes, KineMaster has a free version, but it includes watermarks. To remove watermarks and access premium features, you need a subscription.
3. Which emulator is best for KineMaster? BlueStacks and NoxPlayer are the most reliable emulators for running KineMaster on a PC.
4. Does using KineMaster on a PC affect video quality? No, in fact, using the app on a PC often results in better video quality due to superior processing power.
5. Can I transfer projects from my phone to the PC version? Yes, you can export your KineMaster project files and transfer them to your PC for further editing using the app.